Design your own tapestry crochet patterns online. Draw colorwork grids, create patterns for bags or flat panels, follow row-by-row color changes, and export printable crochet charts. A free crochet tapestry pattern maker with graph tools built in.
Made in your browser. Your designs stay yours. Zoom and pan for larger colorwork charts.
This browser keeps only your latest tapestry chart. A blank grid, template, or photo import replaces it. Download work you want to keep; PNG/PDF files cannot be reopened here for editing.
FROM CHART TO HOOK
How to Make a Tapestry Crochet Pattern
Make your first chart in four steps.
STEP 1
Start with a Grid or Photo
Open the editor with a blank 30 × 30 grid, load a free template (heart, diamond, flower, checkerboard, mountain, or bag border), or use From photo to sample an image into stitches.
Need to crop or rotate your image? Start with Photo to Crochet Pattern, then choose Use for tapestry crochet to get written instructions for flat rows or continuous rounds.
STEP 2
Choose Your Crochet Settings
Set stitch width and height, pick Flat rows or continuous spiral rounds, choose the working direction for row or round 1, and switch US (sc) or UK (dc) terms.
Optional gauge (stitches and rows per 10 cm) estimates finished size. In the round, width is circumference around the tube—not the flat panel width of a bag front alone.
STEP 3
Edit Your Colorwork Chart
Paint colors on the grid, flip if a motif faces the wrong way, and watch the results panel: color letters, run lengths, and color-change counts update as you draw.
Arrows on the chart show the working direction for each row or round. If a row shows many changes, simplify isolated stitches before you cut yarn.
STEP 4
Download Your Printable Pattern
Export a PNG overview with legend and a short instruction preview, or a PDF with numbered chart tiles and full row/round color-change text.
Print PDFs at 100% / actual size so stitch numbers stay readable. Join multi-page charts using the printed column and row (or round) numbers.
Each square represents one crochet stitch (US sc / UK dc). Draw, erase, zoom, and pan on a grid up to 200 × 200 stitches. Start with a blank 30 × 30 grid and a few colors to practice carrying yarn before trying a larger design.
Palette, letters, and stitch counts
Add or replace yarn colors (up to 24). Palette order becomes letters A, B, C… in the written runs so the legend on your PDF matches the hook-side order. The stitch summary shows how many stitches use each color.
Runs in working order
Written instructions follow the arrows, alternating direction for flat rows and keeping the same direction for rounds. Each instruction tells you how many stitches to work in a color before switching to the next.
Local draft only
Your latest tapestry chart saves in this browser, separate from the homepage, Photo, and Filet drafts. Clearing site data removes it. Download PNG or PDF when you need a durable copy; downloads cannot be reopened here for editing.
FLAT OR IN THE ROUND
Flat vs In-the-Round Tapestry Crochet
The same color picture needs different reading rules for flat panels versus bags and cylinders. Switch modes under Pattern settings; chart arrows and written instructions update immediately. The editor supports flat rows and continuous spiral rounds only—not joined rounds.
Flat rows — panels, scarves, blanket motifs
Work back and forth. Row 1 is the bottom of the chart. Direction alternates each row from your chosen start (right-to-left or left-to-right). Right-side and wrong-side rows both appear in the written runs; plan which face shows the cleaner color changes if your carry shows through.
Continuous spiral rounds — bags, baskets, tubes
Work in a spiral without joining. Every round keeps the same working direction. Chart width is the stitch count around one round (circumference). Place a stitch marker at the start of each round; spiral fabric can drift at the seam and motifs may jog slightly where rounds meet.
When to pick which
Use flat for hangings, pillow fronts, and blanket blocks. Use continuous rounds when the design wraps a cylinder and you will crochet without turning. This tool helps you plan color order; it does not draft bag bases, handles, or guarantee a seamless join.
← Row 1Row 2 →← Row 3
Flat
Alternating directions
→ Rnd 1→ Rnd 2→ Rnd 3
In the round
Fixed spiral direction
CHART LITERACY
How to Read a Tapestry Crochet Chart
Same 8 × 4 practice graph, first as flat rows, then as continuous rounds.
One square = one stitch, including the background. Row numbers rise from the bottom; column numbers run left to right across the picture.
Start at the bottom, not the top
Crochet row or round 1 is the bottom of the chart. Column 1 is the left edge of the picture. For flat work, the direction alternates each row. Follow the arrows and written directions for each row.
Flat mode · first two rows (US sc, row 1 right → left)
Row
Read
Work these colors in order
1
Right to left ←
3 sc A, 2 sc B, 1 sc A, 2 sc B (8)
2
Left to right →
5 sc B, 3 sc A (8)
Each row above adds up to 8 stitches. Palette letter A is the light background; B is the motif. Left-handed crochet may still use these chart arrows if you keep the same start direction in the editor—set handedness as a note for yourself, then confirm the arrows match how you hold the work.
SAME GRAPH · FLAT
Alternating directions
Row 1 (right to left)3 sc A, 2 sc B, 1 sc A, 2 sc B (8) · 3 changes
Row 2 (left to right)5 sc B, 3 sc A (8) · 1 change
Row 3 (right to left)4 sc A, 3 sc B, 1 sc A (8) · 2 changes
Row 4 (left to right)2 sc A, 1 sc B, 5 sc A (8) · 2 changes
SAME GRAPH · CONTINUOUS ROUNDS
Fixed direction every round
Round 1 (right to left)3 sc A, 2 sc B, 1 sc A, 2 sc B (8) · 3 changes
Round 2 (right to left)3 sc A, 5 sc B (8) · 1 change
Round 3 (right to left)4 sc A, 3 sc B, 1 sc A (8) · 2 changes
Round 4 (right to left)5 sc A, 1 sc B, 2 sc A (8) · 2 changes
Round totals still equal 8 stitches each, but every round reads the same way—useful for bags where you never turn the work.
TRY THE 8 × 4 GRAPH ABOVE
From foundation chain to row 2
Use two smooth yarns of the same weight: A for the background and B for the motif. This small exercise uses US single crochet, both loops, and a right-to-left first row.
Chain 9 in A. The loop on the hook is not a chain. Work your first sc into the second chain from the hook; the skipped chain does not count as a stitch.
Row 1: 3 sc A, 2 sc B, 1 sc A, 2 sc B. Work one sc in each remaining chain: 8 stitches in total. Change to B on the final yarn-over of stitch 3, back to A on stitch 5, and to B on stitch 6.
Chain 1 in B and turn. This turning chain does not count as a stitch. Work into the last sc of row 1, not into the turning chain.
Row 2: 5 sc B, 3 sc A. Read left to right across the chart. Change to A on the final yarn-over of stitch 5. Count 8 stitches before turning again.
For rows 3 and 4, follow the flat-mode instructions above. Change to the next row’s first color on the last yarn-over of the current row when needed. This foundation method is for this flat practice piece, not a bag base or a universal starting-chain rule.
Chain numbers count away from the hook. Schematic only; use the color runs above for each stitch.
Color letters match the palette order
A run like 5 sc B, 1 sc A, 2 sc B means five stitches of color B, one of A, then two of B. Colors are labeled A, B, C… in the order shown in your palette. After changing a color, check the legend on your downloaded chart.
YARN MANAGEMENT
How to Change Colors in Tapestry Crochet
Tapestry crochet differs from a plain pixel picture because unused colors are often carried inside the fabric. Change color on the last yarn-over of the previous stitch so the new color sits on top for the next stitch. The results panel lists runs in working order and counts how many times you switch.
Live change counts
Totals and “complex” rows (many switches) appear while you edit. If one row needs a dozen changes, consider merging tiny islands or dropping a color before you commit yarn.
Carrying yarn
For nearby color changes, lay the unused strand along the top of the previous row and crochet over it. Keep tension even so the fabric does not pucker and the carried yarn does not grin through. On wrong-side flat rows, check which face will show.
Carrying yarn vs separate bobbins
Tapestry crochet encloses unused yarn inside the stitches. Separate bobbins for distant color blocks use an intarsia-style approach instead; exposed strands across the back are floats. These methods need different yarn handling. For this practice, carry the unused color and start with just two colors per row.
How much yarn will I need?
Yarn amounts depend on your yarn, hook size, tension, and how you carry unused colors. This tool counts stitches and color changes, but does not estimate yarn amounts. Make a swatch with your chosen yarn before planning a larger project.
Lay A along the tops of the stitches you are about to work into. Insert under both loops and beneath A, then work the next B stitch around it. An exposed strand across the back is a float, not an enclosed carry.
Try a change: 3 sc A, then 2 sc B
The third stitch still counts as A even though you finish it with B. Don’t wait until the fourth stitch is complete to switch.
Leave two loops. Work stitches 1 and 2 in A. For stitch 3, insert the hook, yarn over with A, and pull up a loop. Stop with two loops on the hook.Finish stitch 3 with B. Lay B over the hook and pull B through both A loops. One B loop remains. Leave the A strand available to carry.Work stitch 4 in B. Insert into the next stitch and work a full sc with B over the unused A strand. Work stitch 5 in B too.
Yarn-path schematics, not stitch-scale drawings. Grey = A; purple = B. Keep the new loop loose enough to slide along the hook.
BEFORE YOU BUY YARN
Tapestry Crochet Stitch Size & Gauge
Enter stitches and rows per 10 cm in the editor. Estimates update live and appear on PDF export.
Flat panels use width × height
Measure a swatch in the same single crochet colorwork method you will use (including carries if they change your tension). Wash or block it as you will the finished piece.
WORKED EXAMPLE · NOT A GAUGE TARGET
Chart 30 stitches × 36 rows, swatch 20 stitches and 24 rows per 10 cm:
Width
30 ÷ 20 × 10 = 15 cm
Height
36 ÷ 24 × 10 = 15 cm
Estimated finished size: About 15.0 x 15.0 cm (5.9 x 5.9 in) at your gauge
A square grid need not make square fabric if your stitch gauge and row gauge differ. Allow extra for borders and seams. Stitch counts still do not tell you how much yarn to buy.
In the round, width is circumference
For continuous rounds, the chart width is the number of stitches around the tube. The finished-size line reports circumference (and an approximate diameter) plus height—not a flat panel width.
WORKED EXAMPLE · BAG BODY
Chart 60 stitches around × 40 rounds, same 20 sts / 24 rows per 10 cm:
Circumference
60 ÷ 20 × 10 = 30 cm
≈ Diameter
30 ÷ π ≈ 9.5 cm
Height
40 ÷ 24 × 10 ≈ 16.7 cm
Estimated finished size: About 30.0 cm (11.8 in) circumference · ~9.5 cm (3.8 in) diameter · 16.7 cm (6.6 in) tall at your gauge
Diameter is a circle estimate only. Real bags add base shaping, ease, and handle placement that this chart does not design for you.
Proportion illustration, not a fabric preview. Entering gauge estimates size; it does not reshape the chart or correct an imported image.
Choose stitch counts from a target size
Multiply the size in centimetres by your swatch count per 10 cm, then divide by 10.
A 20 × 20 cm panel at 20 stitches and 24 rows per 10 cm needs 40 stitches × 48 rows, before borders or seams. A 40 × 40 chart at that gauge would be only about 16.7 cm tall.
Round to whole stitches and rows, then adjust for any motif repeat. For a tube, use the target circumference in place of panel width. Swatch in the same flat or round method you plan to use.
PHOTO TO TAPESTRY
Convert an Image to a Tapestry Crochet Pattern
Turn a picture into a limited-color graph, with written instructions for flat rows or continuous rounds.
Use From photo in the tapestry editor to sample a JPG, PNG, or WebP into stitches. Choose stitches wide and max colors (2–16). Conversion runs entirely in your browser—images are not uploaded to our servers. The original photo is not kept after you leave; only the resulting graph can save locally.
PATH A · QUICK
1. Convert here
Set stitches wide and max colors, upload, then tidy stray stitches in the grid. Good for simple logos and bold shapes when you do not need a precise crop.
PATH B · DETAILED
2. Crop on the Photo page
Open Photo to Crochet Pattern for crop, rotation, and conversion previews. Edit the graph there until the silhouette reads clearly.
THEN
3. Use for tapestry
Choose Use for tapestry crochet on the Photo results panel. This page loads the graph with flat/round modes, direction arrows, and full color-run text for download.
Color count tips for tapestry
Start with two colors per row. A larger overall palette can still be manageable if each row uses only a few of those colors.
More colors preserve shading but may add frequent switches. Compare a low-color conversion with a more detailed one before choosing.
Prefer high-contrast subjects and tight crops. Soft gradients become speckles—merge or repaint after conversion.
Fewer colors usually beat maximum detail when the goal is a wearable tapestry fabric, not a printed poster.
CHECK YOUR SWATCH FIRST
Common Tapestry Crochet Problems
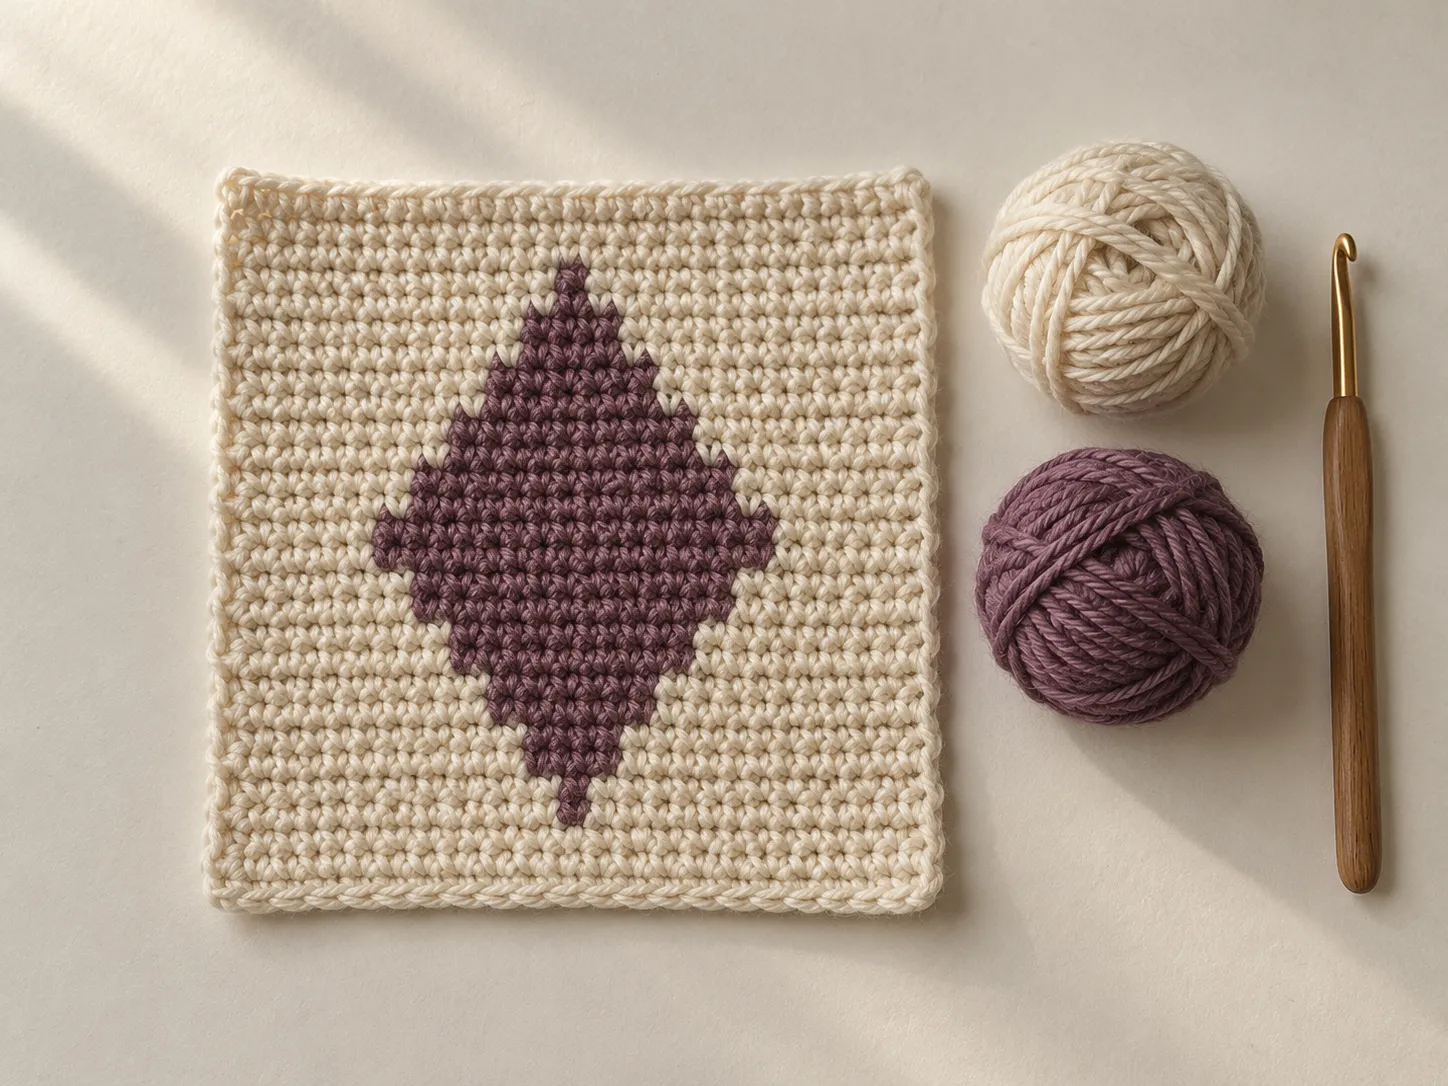
Two-color diamond swatch: a reference for fabric texture and stepped motif edges, not the 8 × 4 reading exercise or a stitch-for-stitch version of an editor template.
Start with two colors in a row
Use smooth, similar-weight yarns with enough contrast to see the motif. Check both faces after a few rows, before making a whole bag or panel.
Total palette size is not the same as yarns handled at once. A four-color chart may use only two colors in each row; another may require all four throughout. For a first project, choose the former.
Keep the carried strand inside the new stitches rather than against one face. If the fabric is too open, test a smaller hook on a new swatch and remeasure gauge. Don’t pull the carry tight to hide it.
Fabric puckers or narrows
Spread the completed stitches along the carried strand before continuing. Leave enough slack to match the fabric width; a tight carry can draw a row inward.
The motif looks squashed or stretched
Measure stitch and row gauge separately. Use the proportions example above to adjust the chart’s row count, rather than assuming square cells will produce square fabric.
The design leans in spiral rounds
Mark the first stitch of each round and recount. Single crochet can lean even when counts are correct; the editor does not compensate for stitch slant or the step between spiral rounds. Test a small repeat first.
A photo becomes scattered single stitches
Crop closer to the subject, reduce the conversion color count, and repaint isolated cells. Inspect the color runs before exporting; fewer speckles mean fewer switches.
Rows lose or gain stitches at the edge
In the practice method above, chain 1 is not a stitch. Work into the first actual sc after turning and mark the first and last stitches. Each practice row must total 8.
EXPORT
Free Printable Tapestry Crochet Patterns
Download charts you can mark up at the sofa, with legend, directions, and written color runs.
PNG overview
Single image with the color grid, optional grid lines in the editor view, color legend with letters and stitch counts, work-mode note, and a short preview of the first row/round instructions. Handy for phones and quick reference.
Printable PDF
Overview page, then numbered chart tiles (up to 40 × 40 stitches per page) with direction marks, full row/round color-change text, optional gauge size, carrying note, and US/UK terms. No account and no watermark.
Printing large graphs
Print at 100% / actual size—avoid “fit to page” if you need readable stitch numbers.
Join pages using the printed column and row or round ranges on each tile.
Keep the overview legend beside you; letters A, B, C… match the written runs.
Charts are colorwork references with written color runs—not full garment patterns with shaping, ease, or yarn brand requirements.
Prefer a ready-made starter? Load a free editable template and export after you recolor it.
FREE TAPESTRY GRAPHS
Free Printable Tapestry Crochet Patterns
Original colorwork starters. Load any example into the editor and edit every stitch.
Tapestry heart
30 × 30 · 2 colors
A two-color heart motif for a flat panel, pillow front, or bag pocket.
Short color runs around the curves—good first flat tapestry chart.
Centered diamond
28 × 28 · 4 colors
A geometric diamond that reads cleanly in flat rows or spiral rounds.
Symmetric diagonals help you check alternating row directions.
Simple flower
30 × 30 · 4 colors
A small blossom with a contrasting center for bags and panels.
Three colors with a few single-stitch accents—plan ends or carries.
Checkerboard
32 × 32 · 2 colors
A repeating check grid for swatches, straps, or full panels.
Regular color changes every few stitches—ideal for carry practice.
Mountain range
36 × 24 · 4 colors
Layered peaks for a landscape band on a bag or blanket strip.
Horizontal color bands with stepped slopes; watch long carries.
Bag border band
48 × 12 · 3 colors
A short repeating border designed for continuous rounds around a bag.
Load in continuous-rounds mode and mark the spiral start each round.
Yes. Blank grids, photo import, templates, flat and in-the-round settings, row-by-row color instructions, local saving, and PNG and PDF downloads are free. There is no account, subscription, or watermark.
How do I make a tapestry crochet graph?+
Start with a blank grid, a free template, or a photo. Set width and height, choose colors, and paint the chart. Pick flat rows or continuous rounds so the working direction matches your project, then read the live color runs before you download.
Can I convert a photo into a tapestry crochet pattern?+
Yes. Use From photo in the editor, or convert with crop controls on the Photo to Crochet Pattern page and continue here for tapestry modes and written color changes. Limit colors for cleaner tapestry fabric.
Can I create tapestry crochet bag patterns?+
You can design colorwork for bags using continuous spiral rounds, where chart width is the stitch count around. The tool helps with color order and change counts; it does not draft handles, bases, or guaranteed seamless joins.
How do I read a tapestry crochet chart?+
Row or round 1 is the bottom of the chart. Flat work alternates direction each row; continuous rounds keep one direction. Follow the arrows and the written labels (for example, right to left). Color letters match the palette legend.
How do I change colors in tapestry crochet?+
Change on the last yarn-over of the previous stitch so the new color is ready for the next stitch. In tapestry crochet, carry unused yarn inside the stitches. Separate bobbins for distant blocks use an intarsia-style approach rather than the same carrying method.
How many colors should I use for tapestry crochet?+
Start with two colors per row. The total palette can be larger without making every row difficult: check how many colors appear together and how often they switch. The editor supports up to 24 palette swatches, but that is a tool limit, not a beginner target.
Can I download a printable tapestry crochet pattern?+
Yes. PNG gives an overview with legend and a short instruction preview. PDF adds numbered chart pages, direction marks, full row/round color-change text, optional gauge size, and US/UK terms. Print PDFs at 100% for readable numbers.
What is the difference between tapestry and filet crochet?+
Tapestry-style colorwork is usually solid single crochet with yarn colors changing for a picture. Filet crochet is a lace grid of open and filled meshes with chain spaces. Use this page for tapestry color runs; open the Filet Crochet Pattern Generator for mesh charts and foundation chains.
Color squares. Clear instructions.
Plan the carries, then download a chart you can crochet from.